今回から6記事構成で3次元テトリスの方を実装していきます。
解説はやや簡易的。ソースコードをコピペしながら開発手順をなぞるだけであなたも3Dテトリスが作れるようになる講座です。
できあがるゲームはUnityroomに投稿したこちらのゲームと同じです。
プロジェクトの作成
まずプロジェクトを作成します。
テンプレートを3Dに選択してプロジェクト名を「3DTetris」にして作成してください。
また、デフォルトで作成されているシーンの名前は「TetrisScene」に変更してください。
3Dテトリスフィールドとなるグリッドの作成
プロジェクトが作成できたら、まずブロックを配置するためのグリッドを作成していきましょう!
テトリス1ブロックを表すマスプレハブの作成
まず1マスを表す「Mass」プレハブを作成します。
次の手順を行ってください。
- メニューのGameObject > 3DObject > Cubeをクリックし箱のGameObjectを作成
作成したGameObjectはプレハブ化し、名前を「Mass」に設定してください。プレハブの保存先はお好みの場所でOKですが、記事ではAssetsフォルダーに保存しています。
プレハブを作成した後はシーンにあるGameObjectの方は削除してください。
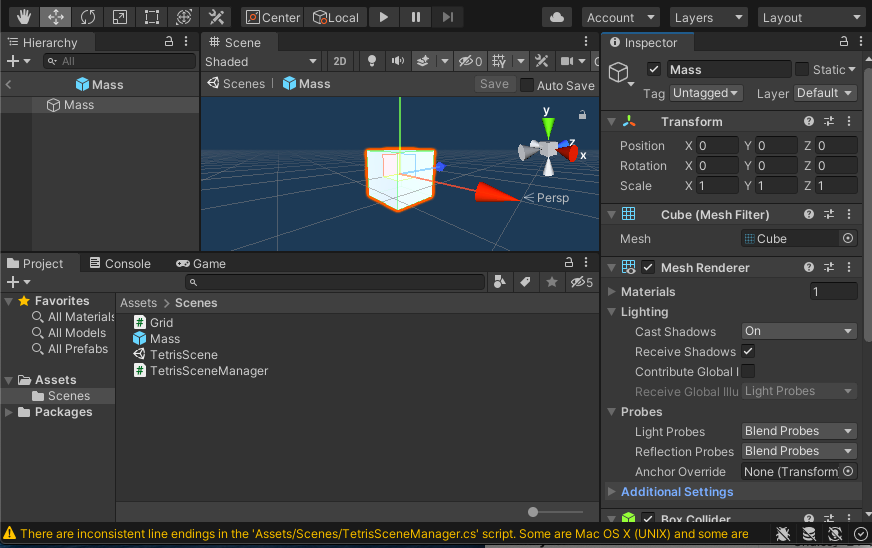
グリッド用のコンポーネントを作成
次にグリッド作成用のコンポーネントを作成します。
「Grid.cs」という新しいスクリプトを作成してください。保存先はお好みでOKですが、記事ではAssetsフォルダーに保存しています。
「Grid.cs」の内容は次のものにしてください。
|
1 2 3 4 5 6 7 8 9 10 11 12 13 14 15 16 17 18 19 20 21 22 23 24 25 26 27 28 29 30 31 32 33 34 35 36 37 38 39 40 41 42 43 44 45 46 47 48 49 50 51 52 53 54 55 56 57 58 59 60 61 62 63 64 65 66 67 68 69 70 71 72 73 74 75 76 77 78 79 80 81 82 83 84 85 86 87 88 |
// Grid.cs Gridコンポーネントの作成 using System.Collections; using System.Collections.Generic; using UnityEngine; enum MassType { Empty, Mass, } class Mass { public GameObject Obj { get; set; } MassType _type; public MassType Type { get => _type; set { _type = value; Obj.SetActive(_type == MassType.Mass); } } } class Grid : MonoBehaviour { public GameObject MassPrefab; public Vector3Int Size = new Vector3Int(5, 10, 5); public Vector3 MassSize = new Vector3(1, 1, 1); Mass[,,] _data; public Mass this[int x, int y, int z] { get => _data[x, y, z]; set => _data[x, y, z] = value; } public Mass this[Vector3Int pos] { get => this[pos.x, pos.y, pos.z]; set => this[pos.x, pos.y, pos.z] = value; } public bool Contains(int x, int y, int z) { return 0 <= x && x < _data.GetLength(0) && 0 <= y && y < _data.GetLength(1) && 0 <= z && z < _data.GetLength(2); } public bool Contains(Vector3Int pos) => Contains(pos.x, pos.y, pos.z); public void BuildGrid() { _data = new Mass[Size.x, Size.y, Size.z]; for (var y = 0; y < Size.y; ++y) { var depth = new GameObject($"Depth{y}"); depth.transform.localPosition = Vector3.up * y; depth.transform.SetParent(transform); for (var z = 0; z < Size.z; ++z) { for (var x = 0; x < Size.x; ++x) { var mass = Object.Instantiate(MassPrefab); mass.transform.localPosition = new Vector3( MassSize.x * x, MassSize.y * y, MassSize.z * z ); mass.transform.SetParent(depth.transform); this[x, y, z] = new Mass { Obj = mass, Type = MassType.Empty }; } } } } private void Awake() { BuildGrid(); } } |
カメラ用のコンポーネントを作成
次にカメラ用のコンポーネントも作成します。
新しく「Camera.cs」というスクリプトを作成してください。保存先はお好みでOKですが、記事ではAssetsフォルダーの中に保存しています。
「Camera.cs」の内容は次のものにしています。
|
1 2 3 4 5 6 7 8 9 10 11 12 13 14 15 16 17 18 19 20 21 22 23 24 25 |
// Camera.cs Cameraコンポーネントの作成 using System.Collections; using System.Collections.Generic; using UnityEngine; public class Camera : MonoBehaviour { public GameObject Target; public Vector3 Offset = new Vector3(0, 0, 0); public Vector3 Dir = new Vector3(0, 1, 0); public float Distance = 10; // Start is called before the first frame update IEnumerator Start() { yield return null; while(true) { transform.position = Target.transform.position + Dir.normalized * Distance + Offset; transform.LookAt(Target.transform); yield return null; } } } |
グリッド用のGameObjectをシーンに配置
コンポーネントができたので、次はシーンにグリッド用のGameObjectを配置していきましょう!
次のGameObjectを作成してください。
- Tetris : 空のGameObject
- – Grid : 空のGameObject
作成したGameObjectには次の設定を行ってください。
|
1 2 3 4 5 6 7 8 |
// グリッド関係のGameObjectの設定内容 ## Tetris : 空のGameObject ## Grid : 空のGameObject - Gridコンポーネント <- 追加 MassPrefab : 「Mass」プレハブを設定 Size : 5, 10, 5 MassSize : 1, 1, 1 //1マスのサイズ。「Mass」プレハブのサイズに合わせてください。 |
また、シーンにある「Main Camera」にも次の設定を行ってください。
|
1 2 3 4 5 6 7 8 9 10 |
// カメラの設定 ## Main Camera : デフォルトで作成されたもの - Cameraコンポーネント(Unityのもの) ClearFlags : SolidColor - Cameraコンポーネント <- 追加 Target : 「Grid」を設定 Offset : -2.5, 0, -2.5 Dir : 0.5, 1, 0.5 Distance : 20 |
配置して設定までできたら、実際に再生して動作を確認してください。
次の画像のようにGridコンポーネントのに設定したものに合わせたグリッドが生成されていればOKです。
ちなみに、デフォルトのままだとマスGameObjectは非表示になっているので、「Grid」コンポーネントの次の箇所を変更しています。
確認用なので、確認が終わったら元の設定に戻してください。
|
1 2 3 4 5 6 7 8 9 10 11 12 13 14 15 16 17 18 19 20 21 22 23 24 25 26 27 |
// Grid.cs グリッド生成の確認 public void BuildGrid() { _data = new Mass[Size.x, Size.y, Size.z]; for (var y = 0; y < Size.y; ++y) { var depth = new GameObject($"Depth{y}"); depth.transform.localPosition = Vector3.up * y; depth.transform.SetParent(transform); for (var z = 0; z < Size.z; ++z) { for (var x = 0; x < Size.x; ++x) { var mass = Object.Instantiate(MassPrefab); mass.transform.localPosition = new Vector3( MassSize.x * x, MassSize.y * y, MassSize.z * z ); mass.transform.SetParent(depth.transform); this[x, y, z] = new Mass { Obj = mass, Type = MassType.Mass }; } } } } |
指定したグリッドのサイズ分マスGameObjectが生成されていればOKです。
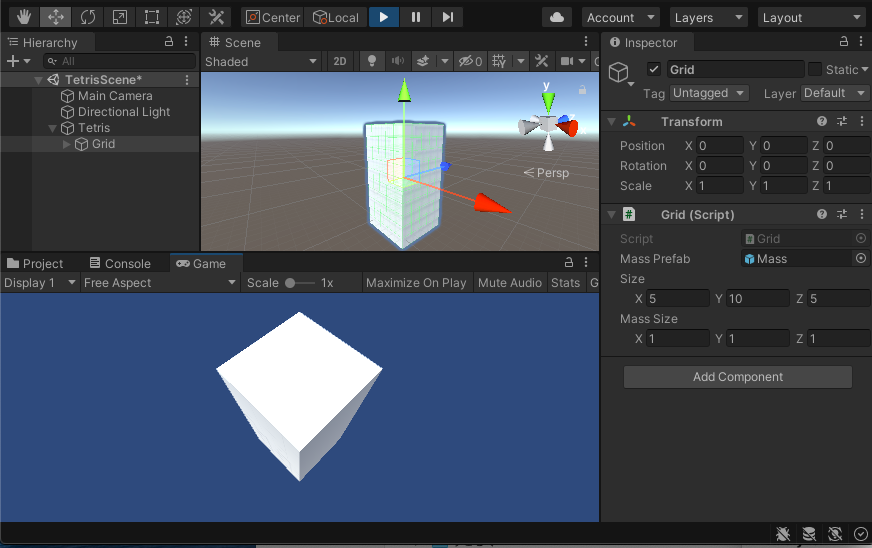
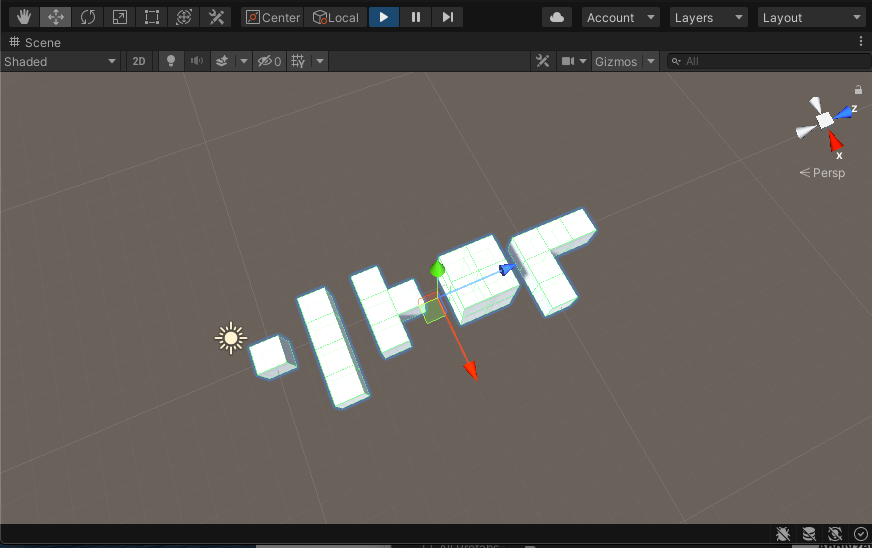
上の画像では全てのマスが表示されるので適当なマスを非表示にして確認するのもいいでしょう。
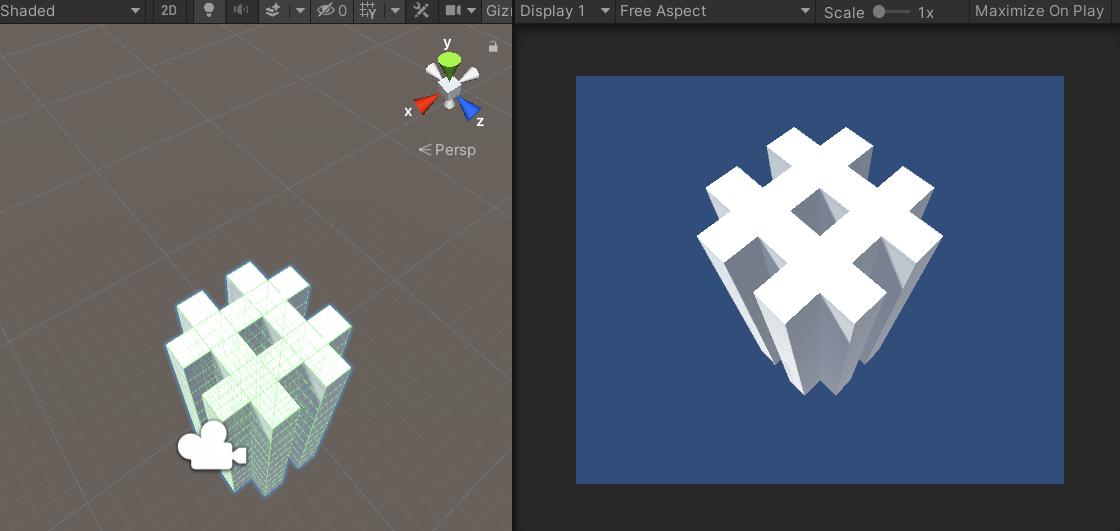
↑の結果は、
|
1 2 3 |
this[x, y, z] = new Mass { Obj = mass, Type = MassType.Empty }; if (x % 2 == 1) this[x, y, z] = new Mass { Obj = mass, Type = MassType.Mass }; if (z % 2 == 1) this[x, y, z] = new Mass { Obj = mass, Type = MassType.Mass }; |
こんな風にすれば作れますね。他にもいろんな形が作れます。
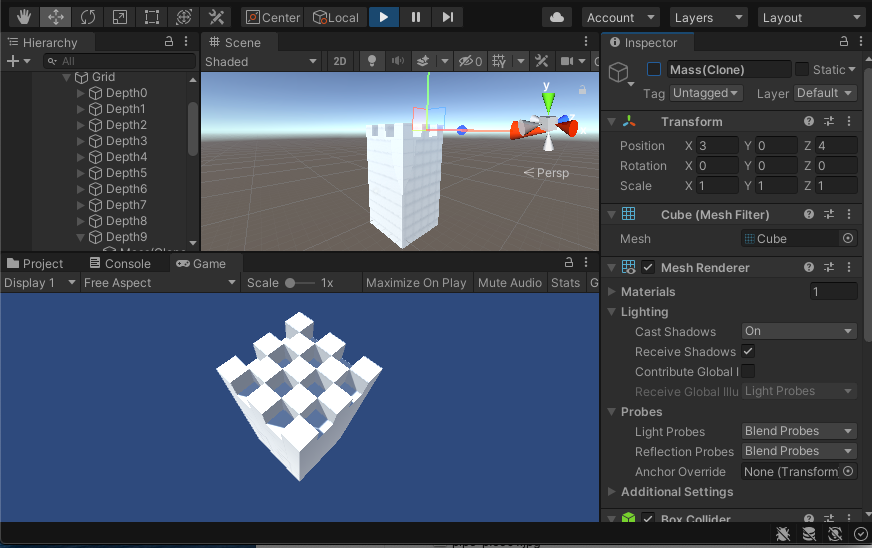
また、実際には全てのマスが非表示な状態が正しいものなので、確認後は必ず元に戻してください。
まとめ
今回の記事では画像の取り込みとその設定について解説していきました。
まとめると以下のようになります。
- 1マス用のプレハブの作成
- グリッド管理用のコンポーネントの作成
- シーンにグリッド用のGameObjectを配置
以上になります。それでは次の記事に行ってみましょう!
次の記事:





コメント