前回の記事では鬼ごっこRUNゲームに使うマップを作成しました。
前回の記事:

今回の記事ではプレイヤーを作成していきます。
キャラクターの共通コンポーネントの作成
それではまずキャラクターの共通コンポーネントを作成してきます。
新しく「CharacterBase.cs」というスクリプトを作成してください。保存先はお好みでOKですが、記事ではAssetsフォルダーに保存しています。
「CharacterBase.cs」の内容は次のようにしてください。
|
1 2 3 4 5 6 7 8 9 10 11 12 13 14 15 16 17 18 19 20 21 22 23 24 25 26 27 28 29 30 31 32 33 34 35 36 37 38 |
// CharacterBase.cs CharacterBaseコンポーネントの作成 using System.Collections; using System.Collections.Generic; using UnityEngine; class CharacterBase : MonoBehaviour { [Range(0, 20)] public float SpeedPerSeconds = 5f; Map Map { get => Object.FindObjectOfType<Map>(); } public Vector3 Pos { get => transform.position; private set => transform.position = value; } public Vector3 Forward { get => transform.forward; } public void Move(Vector3 velocity) { Pos += velocity * Time.deltaTime; Pos = Map.ClampPos(Pos); transform.LookAt(Pos + velocity, Vector3.up); } protected virtual void FixedUpdate() { var rigidBody = GetComponent<Rigidbody>(); var vec = rigidBody.velocity; vec.x = 0; vec.z = 0; rigidBody.velocity = vec; rigidBody.angularVelocity = Vector3.zero; } protected virtual void Awake() { } protected virtual void Start() { } } |
キャラクターはマップの範囲内のみ移動できるようにしているので、「Map」コンポーネントにも次のものを追加して下さい。
|
1 2 3 4 5 6 7 8 9 10 11 12 13 14 15 16 17 18 |
// Map.cs 機能の追加 //次のものを追加 public bool IsInMap(Vector3 pos) { var min = -Size / 2; var max = min + Size; return min.x <= pos.x && pos.x <= max.x && min.z <= pos.z && pos.z <= max.z; } public Vector3 ClampPos(Vector3 pos) { var min = -Size / 2; var max = min + Size; pos.x = Mathf.Clamp(pos.x, min.x, max.x); pos.z = Mathf.Clamp(pos.z, min.z, max.z); return pos; } |
【学歴不問・高卒、元ニートでも挑戦できる】
カメラ用のコンポーネントの作成
次にカメラ制御用のコンポーネントを作成します。
新しく「Camera.cs」というスクリプトを作成してください。保存先はお好みでOKですが、記事ではAssetsフォルダーに保存しています。
「Camera.cs」の内容は次のようにしてください。
|
1 2 3 4 5 6 7 8 9 10 11 12 13 14 15 |
// Camera.cs Cameraコンポーネントの作成 using System.Collections; using System.Collections.Generic; using UnityEngine; class Camera : MonoBehaviour { public Vector3 Direction = new Vector3(0, -0.5f, 1); [Range(0.1f, 100)] public float Distance = 5f; public void LookAt(Transform Target) { transform.position = Target.position - Direction.normalized * Distance; transform.LookAt(Target); } } |
プレイヤー用のコンポーネントの作成
カメラ用のコンポーネントの次はプレイヤー用のコンポーネントを作成していきます。
新しく「Player.cs」というスクリプトを作成してください。保存先はお好みでOKですが、記事ではAssetsフォルダーに保存しています。
「Player.cs」の内容は次のようにしてください。
|
1 2 3 4 5 6 7 8 9 10 11 12 13 14 15 16 17 18 19 20 21 22 23 24 25 26 27 28 29 30 31 32 33 34 35 36 37 38 39 40 41 42 43 44 |
// Player.cs Playerコンポーネントの作成 using System.Collections; using System.Collections.Generic; using UnityEngine; class Player : CharacterBase { Camera Camera { get => Object.FindObjectOfType<Camera>(); } Coroutine _currentCoroutine; public void StartMove() { if(_currentCoroutine != null) { StopCoroutine(_currentCoroutine); } _currentCoroutine = StartCoroutine(MoveCoroutine()); } IEnumerator MoveCoroutine() { while(true) { var velocity = GetVelocity(); Move(velocity); Camera.LookAt(transform); yield return null; } } Vector3 GetVelocity() { var move = Vector3.zero; move.x = Input.GetAxis("Horizontal"); move.z = Input.GetAxis("Vertical"); move *= SpeedPerSeconds; return move; } protected override void Start() { StartMove(); } } |
プレイヤーのGameObjectを作成
ここまででスクリプトの方ができましたので、次はプレイヤー用のGameObjectを作成します。
次の手順を行って下さい。
- メニューのGameObject > 空のGameObjectをクリックし新しいGameObjectを作成してください。
- 作成したGameObjectの名前は「Player」に変更してください。
- 「Player」の子GameObjectとしてメニューのGameObject > 3DObject > CubeをクリックしGameObjectを作成してください。
- 作成したGameObjectの名前は「Model」にしてください。
「Player」のGameObject階層は次のようになっています。
- Player : 空のGameObject
- – Model : 3DObject > Cube
これらの設定内容は次のようにしてください。
|
1 2 3 4 5 6 7 8 9 10 11 12 13 14 15 16 17 18 19 20 21 22 23 24 25 26 27 28 29 |
// Playerの設定内容 ## Player : 空のGameObject - Transformコンポーネント Position : 0, 0, 0 Rotation : 0, 0, 0 Scale : 1, 1, 1 - Playerスクリプト <- 追加 SpeedPerSeconds : 5 - Rigidbodyコンポーネント <- 追加 Mass : 1 // 調節すると他のオブジェクトからの押しやすさを調節できます。 UseGravity : true IsKinematic : false Constraints FreezePosition: x=false y=false z=false Constraints FreezeRotation: x=true y=true z=true - BoxColliderコンポーネント <- 追加 IsTrigger : false Center : 0, 0.5, 0 Size: 1, 1, 1 ## Player > Model : 3DObject > Cube - Transformコンポーネント Position : 0, 0.5, 0 Rotation : 0, 0, 0 Scale : 1, 1, 1 - BoxColliderコンポーネント <- 削除 |
また、シーンの「Main Camera」にも先ほど作成した「Camera」コンポーネントを忘れずにアタッチして下さい。
設定内容は次のものにして下さい。
|
1 2 3 |
// Cameraコンポーネントの設定内容 Direction : 0, -0.5, 1 Distance : 5 |
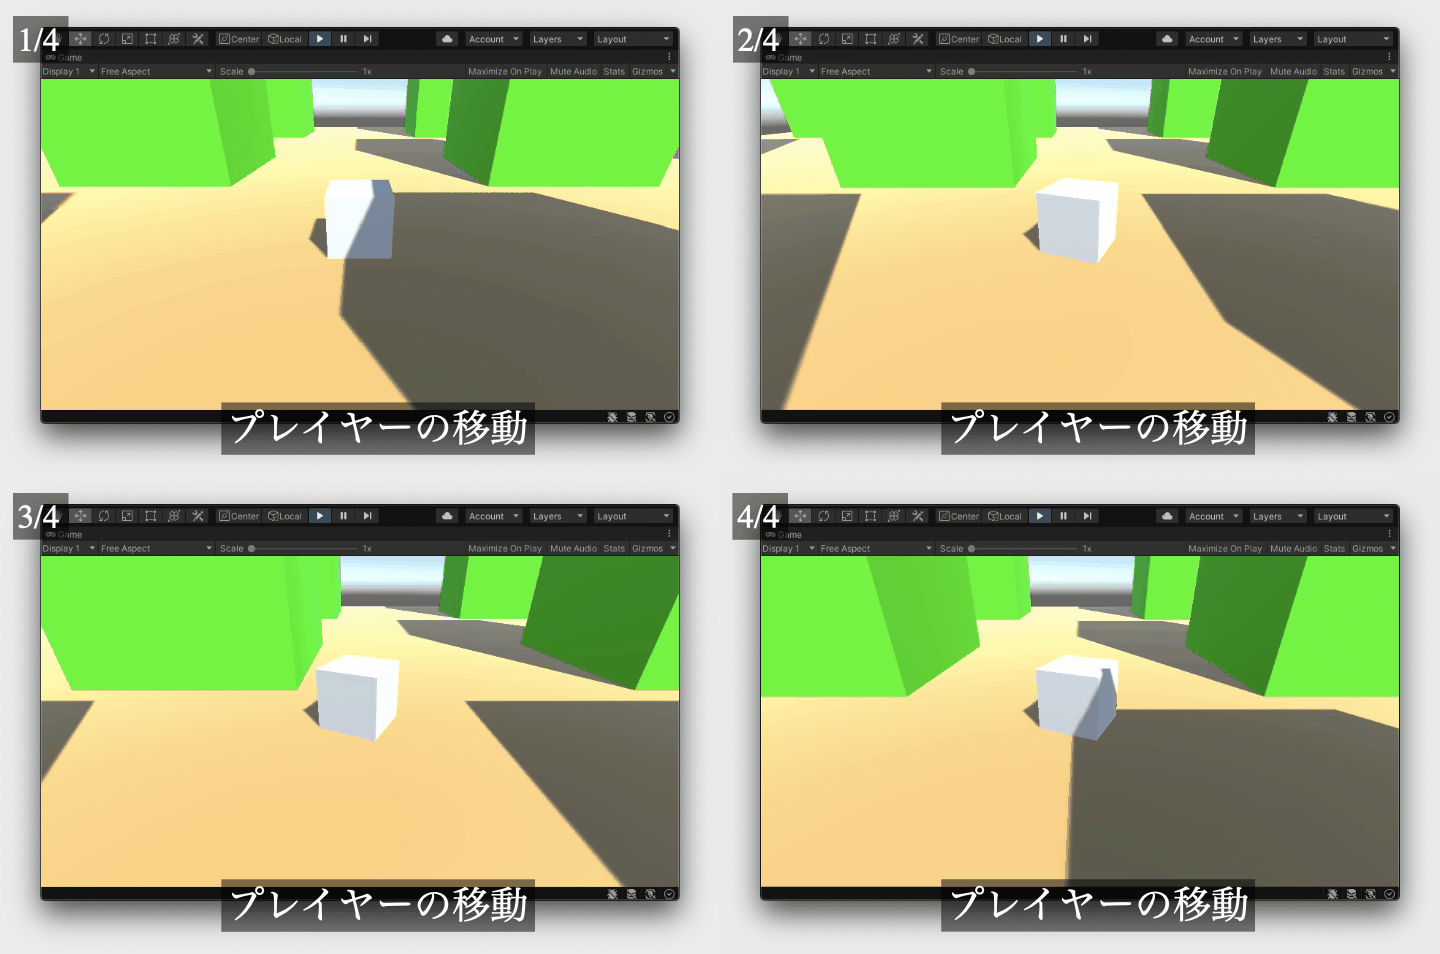
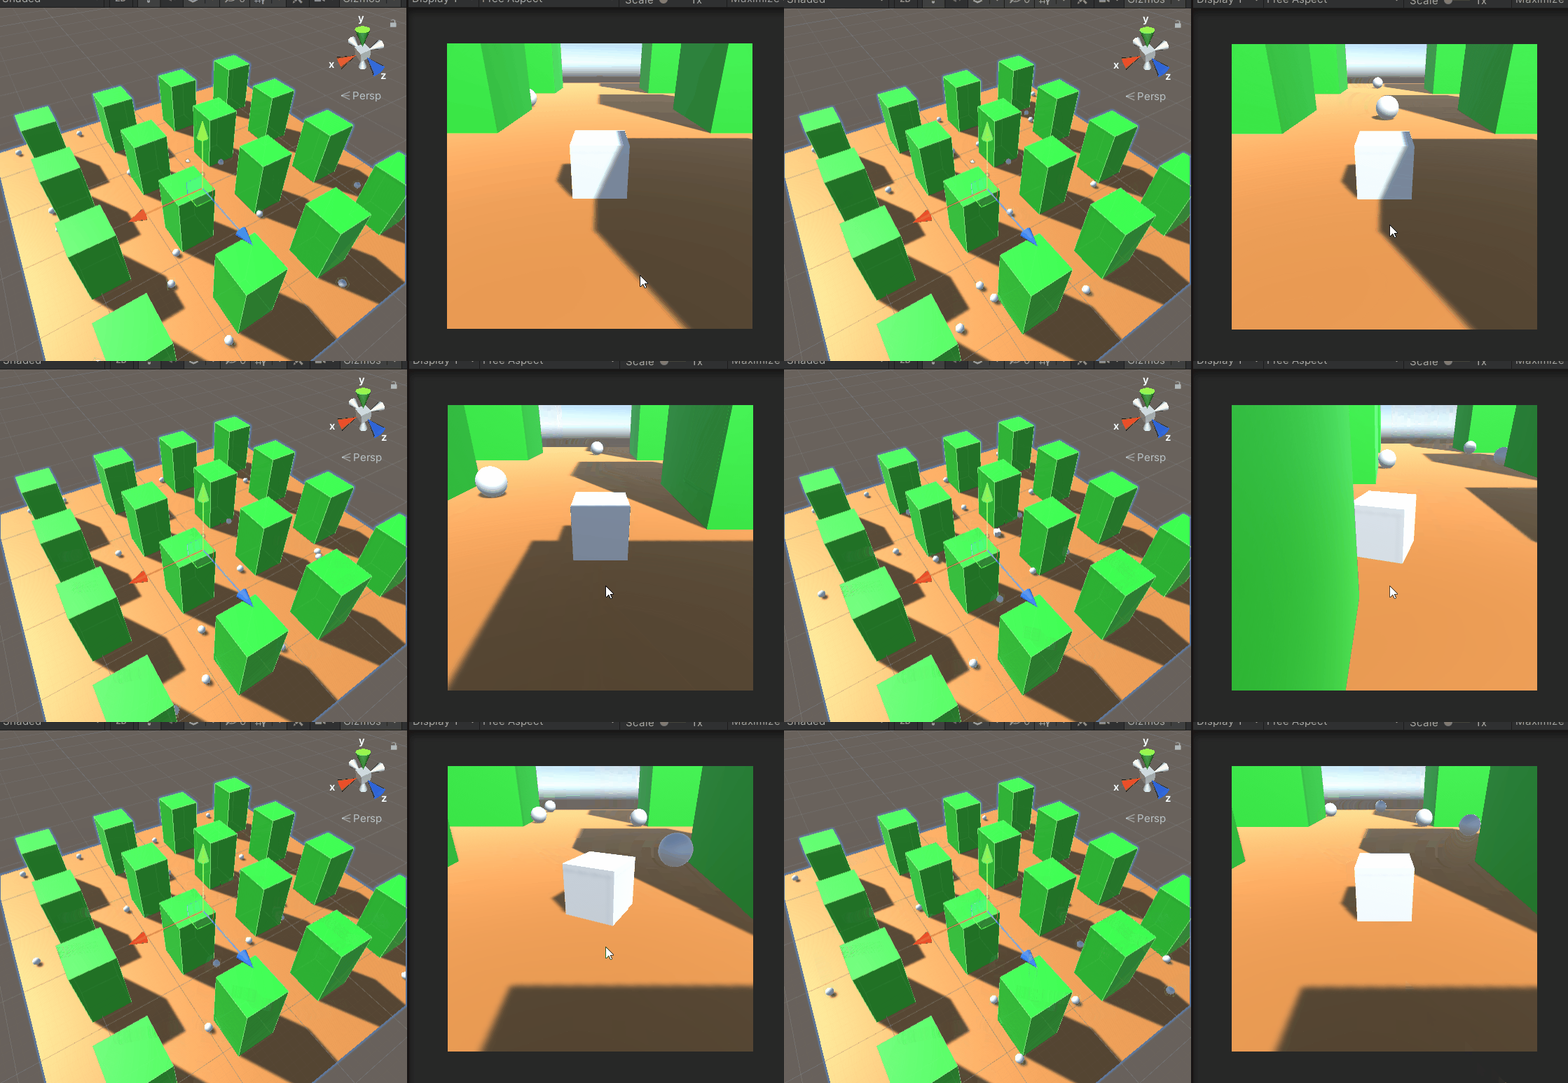
設定がきましたら、再生してみて動作を確認してみて下さい。
次の画像のようにキー入力でプレイヤーが移動していればOKです。
まとめ
今回の記事ではプレイヤーを作成していきました。
マップ際で無理やり移動する状況になるなどたまにマップから落ちてしまいますが、物理エンジン周りの問題なのでその辺りの対処は読者の方にお任せします。(当たり判定用のGameObjectを追加するか、位置修正処理を追加するかになります。)
まとめますと以下のようになります。
- キャラクター用の共通コンポーネントを作成
- カメラ用のコンポーネントを作成
- プレイヤー用のコンポーネントを作成
以上になります。それでは次の記事に行ってみましょう!
次の記事:



コメント